
The History of RAEME in South Australia
until 1965
Major "Norm" MacLeod, RAEME was a South Australian who served for many years in his home State. This History was organised by him and written while he was DADEME Central Command and the Senior RAEME Representative in South Australia
It is reproduced here without editing except that the Indexes have been extended and amended where necessary
Table of Contents Links
PART1 – Paras 1 to 7 —Introduction PART2 – Paras 8 to 48—Corps Background prior to 1939 PART4 – Paras 154 to 159 —1946 to 1948 PART5 – Paras 160 to 265 —1948 Onwards PART6 – Paras 266 to 268 —Conclusion INDEX OF UNITS INDEX OF PERSONNELTHE WAR YEARS – 1939 to 1945
[Begin Part3]
49. At the outbreak of war in 1939, Australian Army Ordnance Corps (Permanent) were engaged in training tradesmen at Woodside who had enlisted in the Australian Imperial Forces. They were posted to light Aid Detachments and Workshops formed in this and other states on completion of their training. Six officers were recruited from civilian industry, but four of them were recalled owing to the shortage of trained civilian engineers.
50. About that time Lieutenant McEwin was the Senior Ordnance Mechanical Engineer (301,1E) in 4 Military District. Lieutenant Cunningham was later transferred from Army Headquarters Melbourne to take over from Lieutenant McEwin, and Lieutenant Duncan took over the Mechanical Transport Workshops at Wayville.
51. The 4 Military District Workshop strength at 1940 was 1 officer and 60 other ranks, which included the following:-
| Officer Commanding | 1 |
| Clerks orderly room and technical store | 3 |
| Armourers | 5 |
| General Engineering section | 12 |
| Instrument section | 2 |
| Wireless section | 2 |
| Electrical section | 2 |
| Blacksmiths and strikers | 4 |
| Carpenters | 5 |
| Welders | 2 |
| Textile section | 6 |
| Vehicle repairs | 4 |
| General duties and attached | 11 |
| Painters | 2 |
52. From 1934 to 1940 Colonel Rainbird was Chief Ordnance Officer and Captain Sorrel was officer commanding Australian Army Ordnance Corps (Militia) from 1938 to 1940. Private B. Woollard was the first Army apprentice in 4 Military District.
53. During that year the Railways Workshop at Islington was manufacturing Bren Gun Carriers and Armoured Cars. A convoy of twelve of these armoured cars was driven through Adelaide and led by Major (later Brigadier DEME) Moran, en route to Victoria.
54. Captain Oates, a Royal Australian Engineer officer from Army Headquarters, set up an office in the Australian Army Ordnance Corps (Permanent) workshop. From this office he purchased from local sources all hand tools and major machine tools for all Army repair organizations in 4 Military District.
55. At the outbreak of the 1939-45 War, Royal Australian Navy Ordnance Artificers, who were normally stationed at Birkenhead, were required at sea. Because of this, the RAN requested the services of Armament Artificers from 4 Military District Workshop to inspect and repair guns fitted to merchant ships, when these ships berthed at Port Adelaide. The artificers selected were Staff Sergeant (now Captain) G. Oakes and Armament Quartermaster Sergeant (later Major) A.L. Gannon. A Gunnery Chief Petty Officer, RAN, accompanied the artificers during these inspections. Guns inspected and repaired were 4" Mark 5 and 6" Mark 7 naval mountings, and 3" anti–aircraft guns.
56. The Australian Army Ordnance Corps (Militia) depot at Keswick was used as a trade training centre and was later moved to Wayville.
4 Military District Workshop
57. In 1939 Lieutenant S. Reeves was the Officer in Charge of 4 Military District Workshop. Because of the expansion required for repair facilities at this time, the Motor Transport Repair Section of 4 Military District Workshop was moved to Wayville Showgrounds. The General Engineering Section which catered for the repair of General Engineering Equipment, Guns, Instruments, Telecommunications, Small Arms, Textile and Boot Repairs, remained at Keswick .
58. In late 1940 Lieutenant H. Clarke replaced Lieutenant S. Reeves. Later, in 1941, the Ordnance Workshops had a representative on 4 Military District Headquarters. This position was held by Major L. Cunningham, who filled the position of Senior Ordnance Mechanical Engineer (SOME). The Senior Ordnance Mechanical Engineer and his staff were located in a civilian house on the ANZAC Highway opposite Keswick Barracks.
59. In September 1941, 4 Military District Workshops became known as the South Australian Line of Communication Workshops (SA L of C Wksp). The establishment was increased and Captain Machin became the Officer in Charge and Lieutenant H. Clarke returned to Victoria. During this period, personnel were exchanged with tradesmen serving in the Ordnance Workshop elements located in Northern Territory.
60. By late 1942, Ordnance tradesmen became a separate Corps, and Australian Electrical and Mechanical Engineers was added to the name of the Workshop, which then became known as the South Australian Line of Communication Workshop Australian Electrical and Mechanical Engineers. At this time, anti-aircraft batteries and search-light companies were located at Whyalla and Draper, Consequently, a new element of Australian Electrical and Mechanical Engineers was raised and became known as Headquarters 9 Australian Anti-Aircraft Workshops.
61. Capt G. Machin was replaced as Officer in Charge Workshops in February 1943 by Major J. Silcock, who returned from Northern Territory. Major Silcock was later replaced by Capt M. Doig, who continued as Officer in Charge until mid–1945.
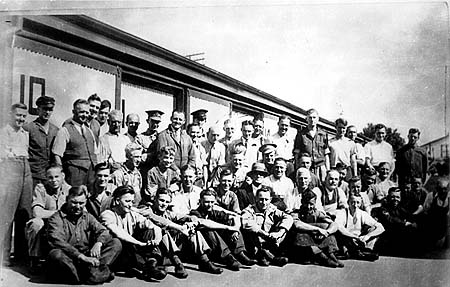
4 Military District Workshop in 1940.
4 M.D. Ordnance Workshop Detachment (Alice Springs)
11 Line of Communications Workshop
2 Australian Motor Transport Workshops
62. The first recognised Ordnance Workshop detachment to move NORTH was formed from the 4 Military District Workshop in February March 1941. This consisted of 1 officer and 30 other ranks and was comprised of motor transport repair tradesmen and a few ancillary trades with Major W. Duncan as Officer Commanding and Warrant Officer Class 2 C. Jackson as 2nd in Command.
63. The remaining members were;-
| Warrant Officer Class 2 | D.Radke | Motor transport |
| Staff Sergeant | G.Tiver | Motor transport |
| Sergeant | A.McDonough | General Engineering |
| Corporal | C.Hughes | Electrician |
| Corporal | L.H.Harrington | Clerk |
| Corporal | McMaster | Storeman |
| Private | Wedding | Motor transport |
| Private | Oates | Motor transport |
| Private | Head | Panel beater/welder |
| Corporal | Simmons | Cook |
| Private | Sparrow | Batman/Driver |
| Corporal | Bishop | Carpenter |
64. The detachment moved to Alice Springs on 4 March 1941, and was originally located in open ground on the WESTERN side of the railhead. After the detachment was set up, Major Duncan left the area and Captain John Silcock became Officer Commanding in June 1941. The unit expanded, and a new workshop, consisting of Motor Transport and General Engineering facilities was erected in the Department of Interior area in the centre of the town. At a later date this was further expanded, and another building was erected on property next to the Police Station in the same area.
65. In July 1941 the detachment became known as the 11 Line of Communication Workshop. Captain Silcock remained as the Officer Commanding, with Lieutenant C. Angas as second in charge, the unit strength then being increased to two officers and 130 other ranks.
66. Because of the build-up in the area, the 11 Line of Communication Workshop proved inadequate, and a further site was proposed. A new Motor Transport Workshop was then built next to the Alice Springs Racecourse, about six miles NORTH of the township.
67 The building commenced in late 1942, and was fully operational in early 1943 with the strength increased to 7 officers and 196 other ranks. The 11 Line of Communication Workshop then became known as the 2 Australian Motor Transport Workshop, Australian Electrical Mechanical Engineers.
68. Captain Silcock was promoted to Major in September 1942 and remained as Officer Commanding with the following officers under his command-
- Captain G. Angas
- Captain J.C. Taylor
- Captain A.A. White
- Lieutenant A.E. Brown
- Lieutenant J. Dingle
- Lieutenant K.A. Milnes
69 2 Australian Motor Transport Workshop was mainly a Motor Transport Workshop and it consisted of 5 main buildings with
- a machine section (General Engineering),
- Heavy Motor Transport section,
- Light Motor Transport section,
- Tyre Retreading section and
- Ancillary Trades section. The Ancillary section carried out carpentry work, textile and tent repairs and all the boot repairs for the area.
70. In August 1943 Major Ellis was posted from 4 Military District and took over as Officer Commanding from Major Silcock and the workshop continued to operate until the end of the war. In 1945-46 it was finally closed down by Captain Cyril Jackson, who was the senior Warrant Officer in the original Ordnance Workshop Detachment.
105 Independent Brigade Workshop
71. 105 Independent Brigade Workshop was formed at the Wayville Showgrounds in early 1942; the strength was 3 officers and 130 other ranks. The officers were Capt M. Brooks, Officer in Charge, Lieutenant A. Crago, a former Regular Army non-commissioned officer, and Lieutenant Tiver, who was promoted from Warrant Officer within the unit.
72, After forming, the unit moved to Springbank, South Australia and in July 1942 left that location and moved to Belmont Common, near Glenelg in Victoria. The unit functioned at that location for approximately three months, then moved to Puckapunyal in Victoria. The unit was disbanded on arrival at Puckapunyal and became part of the newly-formed 6 Australian Armoured Brigade Workshop.
275 Australian Light Aid Detachment
73. 275 Australian Light Aid Detachment was raised at Keswick in late 1941 and was organised to serve with an infantry division headquarters.
74. Lieutenant F. Flint formed the unit with 13 other ranks and was posted as Officer in Charge. In February 1942 the unit moved to Northern Territory and was located at Winnelli, 8 miles SOUTH of Darwin. After 3 months, a further move was carried out to the 45-Mile Mark on the North-South Road.
75. In March 1943 the unit equipment was handed over to a Western Australian unit and the personnel returned to Sandy Creek in South Australia. Here they took over the equipment of the Western Australian Light Aid Detachment, and after reforming, moved to Stuart in Northern Queensland in April 1943. The Light Aid Detachment operated at Stuart until March 1944, when it returned to Brisbane and was disbanded.
106 Independent Brigade Group Workshop
76. This unit was formed at Wayville Showgrounds between January and March 1942. The strength was approximately 120 all ranks and the majority were South Australians with a few Victorians. It was formed by Captain R. Forster and was later taken over by Captain A.A. White.
77. In early March 1942, Captain Forster left with an advance party and moved to Northern Territory. The main body moved there in late March and was located at Noonamah by April 1942. During the following month the unit moved to "44 Mile", Adelaide River. In September 1942 a further move was made to a new site at "38 Mile" Nanton Gap.
78. Shortly after this, four sections were formed (1,2,3 and 5) and became known as the 12 Australian Motor Transport Workshop. The 106 Independent Brigade Workshop then became known as No 3 section of the 12 Brigade Workshop, and Captain E. Patrick, an original member of 5 Recovery Section, became Officer Commanding.
79. No 3 Section moved again in the latter part of 1943 to Wondecla on the Atherton Tableland, where it became the 135 Independent Brigade Workshop with Captain Patrick as Officer Commanding. Later Major A. Taylor took over from Captain Patrick as Officer Commanding and remained until October 1944, when the unit embarked for New Guinea. A further change of Officer Commanding was made, Captain (Temporary Major) W. Hall, the original Officer Commanding of 2/63 Australian LAD, replaced Major A. Taylor.
80. On arrival in New Guinea, the workshop operated in the Aitape area until May 1945, when it moved to Wewak and remained with Major Hall as Officer Commanding, until the end of the war. It was finally disbanded in Brisbane in early 1946.
219 Australian Light Aid Detachment.
[Att 13 Field Regiment Royal Australian Artillery]
81. 219 Australian Light Aid Detachment was formed at Woodside, South Australia during February 1942. The Light Aid Detachment was commanded by Captain H.M. Walkington and commenced with two non-commissioned officers, Warrant Officer Class 2 F. Smith and Sergeant A.M. McDonough, and six craftsmen.
82 During March of 1943 the Light Aid Detachment moved to Wayville where the strength was increased to one officer and fifteen other ranks, and issues of stores and equipment were made, including:-
- 1 Garage vehicle
- 1 Binned Stores vehicle
- 1 Recovery vehicle
- 1 Stores truck 3-ton
- 2 Utilities.
83. On 25 April 1942 the Light Aid Detachment embarked on the SS "Glenpark" at Port Adelaide en route to Sydney and five days later assembled at Ingleburn in New South Wales, where an intensive training programme was undertaken. Training continued until the Light Aid Detachment embarked on the MV "MacDhui" on 8th June 1942 bound for Port Moresby.
84. The Light Aid Detachment arrived at its destination on 26 June 1942 and joined 13 Field Regiment at the four-mile mark outside Port Moresby. The Regiment was engaged in coastal defence duties with troops at Milne Bay and Buna, and the Regimental Headquarters at Port Moresby. 49 Battery was equipped with 18 pounders and 50 Battery was equipped with 4.5 Howitzers.
85. 48 Battery remained in Australia as Depot Battery at Holdsworthy School of Artillery; they were equipped with 25 pounders, and did not go to Port Moresby until after the Light Aid Detachment joined the Regiment. In August 1943 the Regiment was relieved and returned to Australia, accompanied by the Light Aid Detachment.
86. On arrival in Australia, the Light Aid Detachment was given leave and did not re-assemble until December 1943. On this occasion the unit was located at Toowoomba in Queensland and further training was carried out.
87. During May 1944 the Light Aid Detachment moved to Atherton in North Queensland with the 13 Field Regiment and remained with it until it prepared to embark in 1945. However, embarkation plans were cancelled due to cessation of hostilities. The period of training at Atherton was devoted to intense training for jungle operations, including the use of the short barrel 25 pounder, which had been introduced for air drop and jungle operations.
88. The original members of the Light Aid Detachment were:-
- Captain H.M. Walkington
- Warrant Officer Class 2 F. Smith
- Staff Sergeant A.M. McDonough
- Corporal P. Flood
- Private G. Gask
- Private C. Bartram
- Private W. Brown
- Private W. Cleeland
- Private H. Collins
- Private P. Donovan
- Private R. Earle
- Private L. Inverarity
- Private D. Hall
- Private J. Millich
- Private L. Webster
- Private K. Robinson
89 Captain H. Walkington was Officer Commanding for the entire period that the Light Aid Detachment operated.
90. In 1942, Australian Electrical Mechanical Engineers was formed, and the Light Aid Detachment had all the vehicle mechanics and gun fitters transferred from the 13 Field Regiment to the Light Aid Detachment. After the transfer, the Light Aid Detachment strength became one officer and forty-six other ranks. It then consisted of a Headquarters, with a percentage of personnel attached to each battery,
91. The original 16 members were all from South Australia, with the exception of one Victorian; Private W. Cleeland.
92. From the commencement until the disbandment, a total of 57 personnel passed through the unit. Of this total, members were from.-
| SOUTH AUSTRALIA | 32 |
| VICTORIA | 10 |
| QUEENSLAND | 1 |
| NEW SOUTH WALES | 13 |
| WESTERN AUSTRALIA | Nil |
| TASMANIA | 1 |
93. Unit re-unions were commenced in 1953 and carried on until 1957. The re-unions consisted of an ANZAC Night Dinner at the Central Hotel, Adelaide. Because of the shortage of numbers, the re-unions lapsed in 1958, but some members still meet annually with their parent unit 13 Field Regiment Royal Australian Artillery.
5 Recovery Section
[2/2 Army Field Workshop]
94. 5 Recovery Section was formed in Adelaide in May 1940 from personnel from the AIF recruiting depot at Wayville, who had been trade-tested at 4MD Workshop at Keswick.
95. Staff Sergeant A. Gannon and Sergeant E. Patrick were originally in charge of forming the unit, but later command was taken over by Captain R. Brinkman with Lieutenant McGillivray as 2IC.
96. By September 1940 the unit's establishment was complete, i.e. 2 officers and 71 other ranks. They left Adelaide with 6 Recovery Section and sailed on the ship "Nieuw Holland" from Melbourne on 15 September 1940.
4 Recovery Section, 5 Recovery Section and 6 Recovery Section formed the recovery element of 2/2 Army Field Workshop.
97. 5 Recovery Section disembarked on 15 October 1940 in the Suez Canal at El Kantara. From there they moved to Ikingi Marust, which is approximately 16 miles from Alexandria.
98 In late November 1940 portion of the Recovery Section moved into the desert, while the remainder operated in the Alexandria area.
99. Later, in January 1941, members of 5 Recovery Section were brought together and in late February the complete Section embarked on the cargo ship "Devis" at Alexandria and sailed to Greece. At this time Lieutenant McGillivray was replaced by Lieutenant R. Webber, a Regular Army officer.
100. After operating in Greece for about four weeks, evacuation of our forces commenced, equipment was destroyed, and 5 Recovery Section was split up and left Greece; some for Alexandria and some for Crete. Some members reached Alexandria, but others were in a convoy which was recalled to Crete.
101. Ten members were taken prisoner in Greece, including Lieutenant R. Webber. Those members who went to Crete were used as infantry for about four weeks. A further evacuation was then carried out and a further ten members were captured.
102. The unit was re-formed in Barbara in Palestine and was located near the aerodrome. As no equipment was available, tradesmen of 5 Recovery Section were employed in a field workshop located in that area.
103. In August 1941 the unit was moved to Syria, where they rejoined 6 Recovery Section and on 12 March 1942, together they embarked at Tufihr and eventually reached Australia in mid-August. The unit was disbanded and members were subsequently absorbed into other workshop units.
65 Australian Light Aid Detachment
104. 65 Light Aid Detachment was formed by Captain R. Brinkman at Wayville Showgrounds in May 1940. In June 1940 the officer commanding was changed and Lieutenant E.H. Colley, who was assisting in forming 5 Recovery Section, changed positions with Captain Brinkman. Unit strength was 1 officer and 12 other ranks. The unit stayed at Woodside until late June and during this period training was carried out at Murray Bridge with the Royal Australian Engineers on pontoon and bridging training.
105. The unit then moved to Puckapunyal in Victoria. Here they joined their parent unit 2/3 Australian Corps Field Park Company, Royal Australian Engineers, who formed part of Corps Engineers.
106. Training was carried out at Puckapunyal and in February 1941 the Light Aid Detachment embarked at Melbourne on the SS "Mauritania". The ship stayed for three days at Fremantle and a similar time at Bombay, where the unit was transhipped to the ship "Westernland". The unit disembarked at Suez and was transported by rail to Ed Magdal in the Gaza area, where they camped at Hill 69. The unit took an active part in the Syrian campaign and also operated in Egypt, Palestine, Jordan and Lebanon until December 1941.
107. In February 1942 the unit left the Suez area for Colombo in the ship "Sutlej", which formed part of a convoy. Lieutenant E.H. Colley was posted and Warrant Officer Class 2 V. Reseigh became acting officer commanding the unit. "Sutlej" was too slow to keep up with the convoy which headed for Java, so she was diverted to Fremantle, where she took on provisions. The ship reached Port Adelaide, where the unit disembarked at the Electricity Trust of South Australia wharf on 22 March 1942.
108. The unit, including transport and equipment, was railed to East Oakleigh, Victoria, where an Engineer dump was set up. Lieutenant C. Smith was appointed officer commanding and he took over from Staff Sergeant A.W. Marsh, who had been the senior non-commissioned officer of the unit. The unit was refitted and training was carried out. One task was to assist a newly-formed Signal Unit which moved by road from Ringwood Victoria, to Grovelly Camp Brisbane; with 205 vehicles and 100 motor cycles. After the Light Aid Detachment returned to East Oakleigh by road; it packed in readiness to move to the Atherton Tablelands, Queensland. Part of the unit moved by road and the remainder by ship to Cairns. The unit was then located at Rocky Creek on the Tableland area.
109. The unit, with Lieutenant Rosborough appointed Officer Commanding, embarked from Cairns for New Guinea on 18 October 1943, and landed at Buna. It then moved by road to Finchhaven, Scarlet Beach area and back to Finchhaven. After two months the unit embarked for Australia, but at Lae it took over from another Engineer unit which returned to Australia. The unit again embarked for Australia on 9 June 1944 and disembarked at Townsville, then proceeded to Brisbane. At Kapooka, Royal Australian Engineers Training Centre, it underwent a 15 weeks course and then continued with further training.
110. When war ended in 1945, the unit was refitted and ready to return to New Guinea from its location at Wongabell, Queensland. Before moving to Chermside, Brisbane., the unit was engaged in carrying out demolition tasks at Artillery Practice Range. In February 1946 the unit was disbanded by Warrant Officer A.W. Marsh at Chermside.
2/63 Australian Light Aid Detachment
[Attached 2/7 Field Regiment RAA]
111. 2/63 Australian Light Aid Detachment was formed at Wayville in June 1940. When assembled, they moved in August 1940 to Woodside and became attached to the parent unit, 2/7 Field Regiment RAA. The Light Aid Detachment strength was one officer, Captain W. Hall, and 14 other ranks. The senior non-commissioned officer was W02 L. Heffernan, a Regular Army soldier. Training was carried out at Woodside and on 18 November 1940 the Light Aid Detachment embarked and sailed with the parent unit on the Ss "Stratheden" from Outer Harbour. After a seven-day stay in Perth, they left Australia and arrived at Kantara in the Middle East on 17 December 1940.
112. During the next twelve months the unit served at Amria from April 1941, Mersa Matruh from May 1941, and Sidi Barrani from September 1941.
113. On 19 February 1942, 2/63 Light Aid Detachment became part of the newly-formed 9 Division and were located at Aleppo in Syria. From there they moved to El Alamein in July 1942.
114. On 5 December 1942, movement was carried out, with the destination Palestine, but in January 1943 they again returned to Egypt.
115. In 1943 orders were received for the 9 Division to leave the Middle East, and after embarking on the "Niew Holland" on 31 January 1943, they sailed for Australia on 1 February and arrived in Melbourne on 25 February.
116. After a leave period, the Light Aid Detachment assembled on the Atherton Tableland at Kairi by 20 April. Extensive training in jungle conditions was then carried out over a long period, with the unit located at Ravenshoe.
117. The second overseas commitment for the unit arrived, and they embarked at Townsville on the USS "General H.W. Butner" on 8 April 1945, and sailed to Morotai.
118. Captain W. Hall, the original officer commanding, had been replaced by Lieutenant Ridley in Syria, and on 8 April 1945 Captain P.C. O'Sullivan was appointed officer commanding.
119. In May 1945 action was carried out in Tarakan and the unit served in this area until the hostilities ceased.
120. 2/63 Australian Light Aid Detachment finally returned to Australia and was disbanded in November 1945.
2/4 Army Field Workshop
121. 12 Recovery Section was formed at Wayville in January 1941 with Captain J. McKechnie as officer commanding and Lieutenant H. C. Moore as 21C.
122. The Section moved from Wayville to Balcombe in Victoria in April 1941, then to Puckapunyal in Victoria in May 1941, where it became part of 2/4 Army Field Workshop together with 10 Recovery Section and 11 Recovery Section. Captain McKechnie was promoted Major and became OC 2/4 Army Field Workshop.
123. This unit embarked at Port Melbourne on the ship "Marnix Van Sint Aldegonde" on 31 July 1941 and sailed for Singapore, arriving there on 15 August 1941. It moved into camp at Anson Road Singapore into the 2/4 Motor Transport Unit area, which was commanded by Major J. Harris, then subsequently moved to Johore Bahru in Malaya in October 1941, where it changed its unit identification to 27 Independent Brigade Group Workshop.
124. After the Japanese attack on Singapore, the unit was again moved, this time to Kluang in December 1941, and operated NORTH of that area in independent sections until it moved back to Singapore in early February 1942. Vehicles were withdrawn from the unit, which then dug in in a defensive position around Tanglin Barracks. On 13 February Captain Moore and 10 specialist members of the unit were moved to Java-Sumatra. Captain Moore was killed during this move.
125. Singapore fell on 15 February 1942 and unit members were captured and moved to Selarang Barracks in the Changi area. Officers and other ranks were separated, but the other ranks managed to keep together until 14 April 1942, when working parties named A–H Forces were formed by the Japanese.
126. A Force was sent to Burma (Tavoy Aerodrome), Mergui (Victoria Point) and kept moving whilst they built a road and railway from the 15 Km mark to the 105 Km mark. Some members were sent to Bukit Tumah to build a shrine to the Japanese dead.
127. B Force moved to Borneo, where all members were lost. No record can be found of C, D and E Forces, but F Force moved to Siam and Burma and G and H Forces to Siam. F, G and H Forces worked on the Burma–Siam Railway.
128. Prisoners were released from Changi Bankok and Petchaburi on 28 August 1945 and returned to Australia between September and October of that year.
129. Of the unit strength of 2 officers and 71 other ranks, casualties were 20 dead.
301, 302, 303 Australian Light Aid Detachments
130. 301 – 302 – 303 Australian Light Aid Detachments were raised at Wayville in February 1942 for the purpose of carrying out unit repairs for units of the 6 Cav Bde. The OCs were-.-
- 301 LAD Lt J. Glenn
- 302 LAD Lt R. Hallett
- 303 LAD Lt A. Bruce.
131. These Light Aid Detachments never actually operated with their parent units because soon after being raised, they moved to Geelong, Victoria, and in July 1942 were disbanded and the equipment and personnel absorbed in 105 Ind Bde Wksp, which then moved to Puckapunyal to form the 6 Armoured Brigade Workshop.
6 Recovery Section
[2/2 Army Field Workshop]
132. 6 Recovery Section was formed at Wayville between May and August 1940. The personnel were drawn from AIF recruiting and consisted of 2 officers and 71 other ranks. The Officer Commanding was Captain J. Redpath with Lieutenant P. Fooks as second in charge.
133. This Recovery Section formed part of the Recovery Element for the 2/2 Army Field Workshop, with 5 Recovery Section (SA) and 4 Recovery Section (Vic).
134. On 13 September 1940 the unit moved to Melbourne, and on 15 September embarked on the ship "Niew Holland", together with the remaining recovery elements of the 2/2 Army Field Workshop.
135. After calling at Perth and Colombo, disembarkation was carried out near the Suez Canal at El Kantara on 15 October and the unit moved into camp at Helwan the following day.
136. During the next eighteen months 6 Recovery Section operated and served in the Middle East and were located at various times in Alexandria, Sidi Barani Bardia, Tobruk, Madelelina, Mersa Matruh, Jordan Valley, Khassi, Haifa and Bierut.
137. During the period of service in the Middle East, much time was spent on the recovery and repair of enemy equipment which was captured and eventually used by our own forces.
138. The Section was separated from the parent unit, the 2/2 AFW, for long periods, including one spell of eight months. One task of note carried out by the 6 Recovery Section was after the capture of Tobruk. A Welding Section was sent out in a vehicle and moved with the protection of tanks. The purpose was to recover another tank damaged during action. The task was completed, and as a result three members of the unit, Sgt Bill Allison, Pte Scotty Smith and Pte Ossie Dunning, were awarded the Military Medal for their gallant action.
139. With the entry of Japan into the War, changes were made and on 12 March 1942 the unit embarked at Tufihr on the Dutch ship "Westernland" and sailed for Colombo, where they were located until mid-July.
140. The return to Australia was carried out when the unit embarked at Colombo on the British--India ship "Ekma", and after calling at Perth, arrived in Port Melbourne in mid-August.
141. All members were granted leave to their home states, and later assembled at Singleton (NSW) with the 2/2 AFW in September 1942.
142. The Recovery Sections were disbanded at this stage, and the personnel were absorbed into newly-formed Ind Bde Wksp and other existing workshop units.
274 Australian Light Aid Detachment
143. 274 Australian Light Aid Detachment was formed at Wayville by Lt E. Williams in January 1942, and had a strength of 1 officer and 15 other ranks. After being raised, the unit was attached to 6 Cavalry Brigade and located at Springbank (SA).
144. In May 1942, 273 Australian Light Aid Detachment was required for movement, but as it was not completely formed, 274 Australian Light Aid Detachment changed identification, and became known as 273 Australian Light Aid Detachment (AIF).
145. At the end of May, this unit moved from Springbank and joined its parent unit, 12 Division Signals, in Northern Territory in mid-June 1942. From this date until August 1943, the unit remained in NT before returning to Adelaide.
146. After the unit members returned from leave, the unit moved to Homebush in NSW, and was again attached to Signals. On arrival at Homebush, the officer commanding was changed to Captain H. Day, and WO2 W Bailey became 21C.
147. In April 1944 the parent unit, with the LAD, was located at Narellen (NSW) and about the end of June 1944 it was disbanded at Narellen, and all personnel were re-allocated to other existing AEME units.
HQ 9 Australian Anti-Aircraft Ordnance Workshop
148. In late 1942, two Anti-Craft[sic] Batteries, RAA and two Anti-Craft[sic] Searchlights Companies RAE, were located in South Australia, with a Battery and Company each at Whyalla and Draper.
149. Workshop facilities were required to carry out first and second echelon repairs for these units, and consequently the following Workshop units were formed, each taking the title of the parent unit, and were known as.-
- 12 Australian Anti-Aircraft Ordnance Workshop
- 26 Australian Anti-Aircraft Ordnance Workshop
- 58 Australian Anti-Aircraft Searchlight Workshop
- 69 Australian Anti-Aircraft Searchlight Workshop.
150. 12 Aust AA Wksp was located at Albert Park with Lieutenant C. James as OC, whilst Lieutenant J. Lapidge commanded the 26 AA Wksp at Whyalla. Lieutenant A. Lake was OC of 58 AA SL Wksp at Albert Park and Lieutenant F. Campbell had the 69 AA SL Wksp at Whyalla .
151. The Workshop units were formed at Wayville in late 1942 and moved to Albert Park in February 1943. 26 AA Wksp and 69 AA SL Wksp then moved to Whyalla. These units operated until late 1944.
152. During this period, a variety of tradesmen were employed and were responsible for First and Second Echelon repairs to the AA Guns, including Bofors (Light), 3.7 AA Guns (Heavy),searchlights, instruments, vehicles and ancillary equipment. During the initial stages, the workshops were also responsible for the installation of the guns and equipment in the Draper and Whyalla areas.
153. Although these four workshops were independent units, they all came directly under HQ 9 Aust AA Ord Wksp, which was responsible to the DADEME in the HQ SA L of C Area.
[End of Part3]