

Removing and Replacing a Centurion Clutch
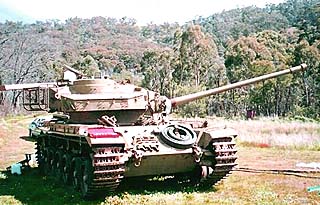
Photo by Col Filtness ... more on 169040
Bruce Cameron who is writing the official history of 1st Armoured Regiment RAAC in South Vietnam asked
"Was a goer but blew the clutch as they were taking it off the loader.Spent 48 hours half blocking the Melbourne/Yea road complete with blue flashing lights and all(the little darling)".
"For all you DS instructors/RAEME people out there.....Do you need to lift the transmission to change the clutch?"

Vietnam 1969
To answer the question, here is the sequence as I recall, but first, it is not possible to remove the clutch without either removing the engine or the gear box.
The gear box has no more than about half an inch movement when the mounting bolts are removed and the clutch input shaft is about 4 to 5 inches inside the engine.
Removal of the engine should not be taken on unless it has to be replaced and that sequence may overtax my memory.
Take your time, think about each step and don't stand under anything heavy. I remember one of my LAD OCs from Armoured Regiment days, came to the rear of the tank I was doing a clutch change on to ask me how I was going, I looked up and the gear box was suspended directly over his head, he saw the look on my face, looked up and moved like a rocket.
| Step 1. | Raise the transmission decks and lay them on the engine decking. |
| Step 2. | Raise the radiators and lean them on the side walls of the compartment |
| Step 3. | Remove the rear footplate, the centre support rail and the 2 foot plate support brackets. Make sure that all of the bolts/nuts/washers are kept in a safe place |
| Step 4. | Remove the thin baffle plate from between the main engine fans |
| Step 5. | Remove the tiewire from the quill shaft retainers (half moons), remove the half moons and withdraw the quill shafts from the gear box. They will slide into the final drive so that just the inner splines are visible |
| Step 6. | There are 4 transmission mounting bolts, 2 holding the front gear box mounting and 2 to the rear of the box, the bolts on the front mounting are wired and will unscrew to allow the top of the mounting to be removed. The 2 rear mounting bolts are placed in position from the top and are secured by nuts which have to be held during removal. They are normally bloody tight |
| Step 7. | The clutch drive flange is secured to the gear box by about 8 or 10 bolts, I can't remember if they have nuts or if they are wired, could be both. When there are only a couple of bolts to remove it will be necessary to support the clutch with a large socket or such to prevent the clutch dropping. |
| Step 8. | The gear box should now be ready for removal using the eye bolts on top. It may be necessary to hold the radiators in the vertical position when lifting the gear box out. When removed (I think it weighs half a ton), make sure that the shims under the rear mountings are kept separate (L & R). The front bottom mounting is then removed, once again there are shims that must be replaced where they came from when reassembling. |
| Step 9. | The rear main oil seal housing, located at the front of the engine (the engine is fitted to a Centurion with the front of the engine to the rear of the vehicle) is secured by about 8 nuts (I think) these must be removed and the seal housing withdrawn so that it sits loose on the clutch drive shaft |
| Step 10. | The clutch should now be ready for removal. A suitable sling can be made by manufacturing 2 hooks from 5/16 steel rod with an eye fashioned at the other end. The hooks are placed into the vent holes around the clutch housing and the eyes attached to suitably strong slings (chains preferably). You will have to roughly work out the balance point. |
| Step 11. | Take the weight of the clutch and slowly ease it out of the engine making sure that no damage is done to the studs in the engine. |
| Step 12. | Carefully lift the clutch out of the transmission compartment after ensuring that it is balanced or you might lose it. |
| Step 13. | Before replacing the clutch a new seal should be fitted, using great care, because by now you will have discovered what a bastard of a job it is. |
The replacement sequence is merely the reverse of the removal but there are a couple of things that may ease the replacement sequence, particularly of the gear box.
- When the clutch has been refitted and supported, place the bottom section of the front mounting in place, ensuring that the shims are in place, and position the mounting with the securing bolts.
- When the gear box is being lowered, place the two rear mounting bolts in the bolt holes and when the box is close to its position, place the shims on the bolts and hold in place while seating the box.
- Before disconnecting the sling, make sure that the front and rear mounting bolts are free to turn.
- Don't forget to remove the item that is holding the clutch up.
- The last one .... When reengaging the quill shafts, it will probably be necessary to rock the steering brake drums to line up the splines; they should go in easy but can cause a bit of blood pressure. (Refer to my article in the Craftsman) and watch out when you step back to admire your expertise.
By the way, if you hear any original words describing what working on a cent is like, please let me know them too. I don't think you will though.
That reminds me of the time I was doing a plug change on a Cent in the LAD hangars at Pucka. I reckon I was about half way through and, as usual, not enjoying life, probably doing the exhaust plugs on a fairly hot engine, when the crew commander, a Duntroon graduate called out to ask how long I'd be.
I slowly got up off my belly, picked up a 2 1/2 pound ball pein hammer and asked him how he'd like it between the eyes. He left straight away and didn't come back until he saw me sitting onthe side of the tank having a smoke.
By then he must have noticed a change in my demeanor and said "Is it safe to ask you how long you'll be now Frank?". They were a pretty understanding bunch of young officers and must have had a sense of humour.
I cannot understand why anyone would buy a Cent. This is the second one I've heard of but I also remember having a lot of fun when working on the bloody things.
As background below is an extract of a page on Centurion 169040 taken from Col Filtness' excellent web site http://steel-thunder.tripod.com/. The site is Col's collection of photos, stories and memories from times past, of all the Centurion Main Battle Tanks that were found in Australia which served in the R.A.A.C. So far he has found 122 Centurions from a total of 142 that entered service with the R.A.A.C.
Col has also produced a CD of his photos which is available at a small cost. Contact him here by e-mail
Steel Thunder ~ Col Filtness
169040
When I last saw 169040 she was sitting in the storage yard of Vince Ryan's, a bit out by herself.

Then early this week I heard that Graeme Potts and his mate Lindsay Briggs had located her near Yea. I was on my way up the next day and was lucky enough to locate her with the owner, Stuart Buchanan on site.All the id plates were missing but as she was not a Vietnam tank there was no point on putting the incorrect number on her. But even the engine compartment id plate was missing
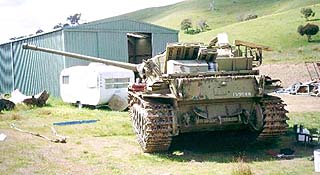
She runs well but has a shot clutch, but Stuart has one to put in, easier said than done. I was able to give Stuart a workshop manual to help him out but its still a big job.
But she just had an oil change and does need a few roadwheels retreads and with the clutch installed she will be off
Stuart knew the clutch was sloppy but did get a surprise when he drove her off the low loader and blew it. There she sat until they could get a heavy haulage tow truck from Melbourne. She was then towed about 100 yards and the bill was $600
Stuart sent me some pics of her being unloaded

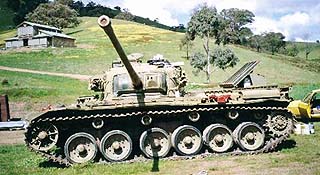
169040 arrives at the property, but they were unable to enter with the rig so she was unloaded onto the road. Motor fired up and warming up to drive off.

And this is where she stopped
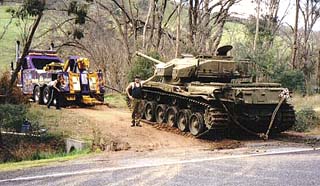
When the Heavy Haulage gear arrived from Melbourne, it was then an easy job to tow her into the property but bloody expensive
I think the transmission will need to be removed to do the clutch and that will be a big job as I cannot see it being done without a crane, but I have been told that it can be done. Will be interesting to see how it goes